Golden Center
Golden Center

Creating a walnut and maple structure to frame TV and conceal all AV cables and hardware.

10430396_10152894021978784_4321489057948834226_n

Each walnut panel will have a 1/2″ gap between pieces. Recessed behind the panels will be a maple backing. Cabinets and shelves will be maple as well.

Dataport and outlet will not be visible as seen in picture. There will be a cabinet door blocking it from plain view

10929145_10153052902498784_5492053510309454558_n

Starting point … sub-woofer unsuccessfully trying to conceal routers, chargers, wires, etc.

IMG_1981

Side-view starting point.

IMG_1736

Walnut plywood to get 4 of the 8 pieces needed.


IMG_1738

Eight pieces cut to rough size with walnut hardwood stock to make edge band strips.


IMG_1744

Gluing lengths of edge-banding to one of the panels.


IMG_1743

First set of edge band strips glued to one panel.


IMG_1761

All panels completed with edge banding … Next weekend sanding and finishing.


IMG_1776

Maple plywood that will be used to make the cabinet boxes.


IMG_1779

Cabinet pieces cut to rough size for construction.


IMG_1789

Getting a cabinet square before gluing and construction … Always surprising how this ends up being the most complex part of the project.


IMG_1816

Cabinet pieces (interior pre-finished) ready for gluing assembly.


IMG_1818

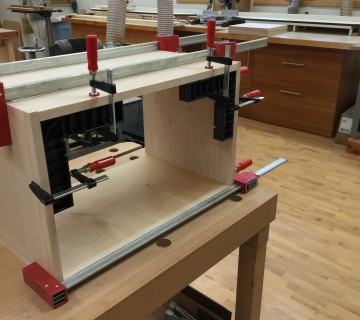
Cabinet boxes glued-up. Next up … making cabinet doors to size on front … then shape, sand and finish all corners and edges.


IMG_1837

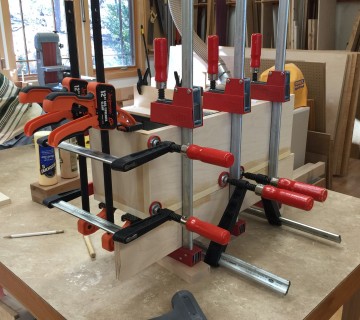
Lightbox end-caps and sides being glued together. Due to many sides being glued … take a few more clamps and right-angle blocks to make them square.


IMG_1838

Both sides of lightbox end-caps after gluing, shaping and initial sanding.


IMG_1840

All pieces brushed and vacuumed in preparation for first coat of finish.


IMG_1843

First coat of finish applied.


IMG_1863

All eight panels completed. Took four coats of poly.


IMG_1853

Cross beams for the base. The semi-circles go topside so AV and Internet wires can run across the entire bottom.


IMG_1873

Cross beams inserted in dado grooves. Next step, fasten finished maple plywood to front and sides for toe-kick.


IMG_1887

Attaching the maple backing to the walnut panels.


IMG_1903

Lighting hardware readied for installation.


IMG_1891

Door hinges installed.


IMG_1894

One completed cabinet … final finishing included steel-wool followed by waxing.


IMG_1982

Transporting pieces into San Francisco Condominium.


IMG_1989

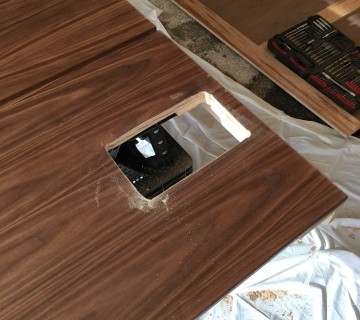
Slight oversite … didn’t pre-cut a hole for the outlets … had to free-hand a jigsaw cut. Fortunately, this goes behind the cabinet and isn’t viewable.


IMG_1992

Attaching all vertical pieces before placing on wall.


IMG_1983

Aligning the base into position.


IMG_1993

Quick check to make sure rough dimensions are aligning as hoped.


IMG_1998

Attaching 2×4’s to studs in wall … the backing to the panels will screw into these.


IMG_2004

Attached base plate and TV wall mount in place.


IMG_2007

Panel “wall” in place.


IMG_1904

With a forstner bit in the drill press, one can make a very precise angled pilot hole. This is important to get a clean attachment of the panel wall to the 2×4’s that are place on the wall (as seen in next photo).


IMG_2006

Vertical view of how panel wall was attached to 2×4’s. Notice how pilot holes made from previous photo allow the screw to be secured in the backer board while also being concealed.


IMG_2014

Phillips HUE LED bulbs. Each light connects to a WiFi bridge to control dimming, color, and timing for when lights turn on and off.


IMG_2016

An Omnimount Elite TV Mount. I have a 60″ Samsung Smart TV … but the mount will support up to 80″ if/when I upgrade the TV.


IMG_2019

Designed the wells of the base for all routers, bridges, wires, etc.


IMG_2044

Just realized that the Sonos Playbar needs to be connected to both power and the TV (obviously). Had to run to Lowes to by a 1 1/4″ grommet and 1 1/4″ wood boring bit.


IMG_2043

Inside right-hand cabinet … two holes are on the bottom of cabinet (only one is visible in this picture). The visible hole on the bottom right empties outside to connect the subwoofer. The other hole behind the PS3 goes to the center bottom of the base where all the WiFi bridges and surge protectors are located.


IMG_2077

Complete!  Front View


IMG_2046

Complete! Side View

  • Wood Grain Walnut & Maple
  • tags : ,